
Tags
Hi. This time I decided to go another way. This is partly because of this amazing article written by by a colleague and dear friend Simon Sherbourne that inspired me. Pro Tools has been a DAW I have loved and still do. Over the years, I have made quite a few scripts for myself, some of which are here, here and here. This DAW has in my personal opinion, without a doubt given the most amount of flexibility in a film mix. There are some very simple reasons for this. One being that the learning curve is absolutely minimal. There are just 2 windows you need to be aware of! The Mix and the Edit window. The next important thing is the efficiency of the engine. Like I mentioned before, the whole mix of a film like Bombay Velvet was able to run from a Laptop with more than 200 tracks at 96kHz. Now, thats something worth noting. But the thing that held me on to this DAW is just the way it sounds and the efficiency of the plugins it has. Granted there may be a lot of other DAWs out there with tons of features, and I am not going on a comparison run here. But, for me, this is where everything began. Dolby’s atmos plugin is an AAX plugin. Spanner is an AAX plugin. like that and so on, this has a whole world dedicated to it. But that will be the stuff for probably another blog post!
This time, lets look at some of the shortcuts I use daily and some of the tricks I learnt along the way on a daily basis.
- Morphing Parameters.
Many times, I wanted to be able to change everything from one preset to another on a single track. There was always the option of glide. But I had a bit more of a requirement. This was to be able to change parameters of all inserts, sends, volume and pan on a track from point A to B. I would set up the parameters on the track initially by a snapshot. I would then change view on track to volume or so and do Command+Control+X. What it does is it cuts all automation and makes a straight line connecting the parameters. Have a look at the video below. I have used cut special but you can use Command+Control+X for this.
2. Bus Metering
Normally when you compile tracks and send them via a bus to an Aux, there is an issue to see if the signal is clipping on the bus. If you reduce the aux, you will just be reducing a clipped signal. Also when there are plugins on the aux or the tracks, the clip indication on the plugins is the OUTPUT of the plugins not the input to it. So, if a plugin turns red on the track or Aux, it means that the plugin output is clipping. To view the metering on the bus, what I usually do is to click on the maximise button on the Audio Output window. This will give an additional metering that will show the overall sum level of all tracks in the session that are routed to the corresponding output path. This is the same metering as on the Bus Master Fader.
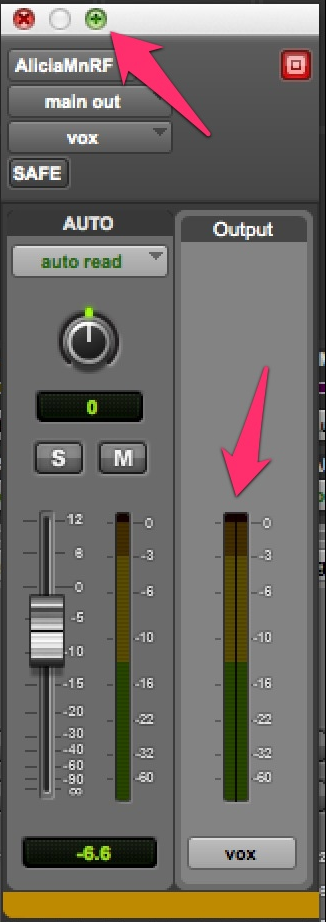
Bus Metering
3. Band Pass EQ
I have been using this for years and it shouldn’t be a surprise to people actually. Holding down Control +Shift and clicking on a band in EQ3 or Channelstrip will provide a band pass. This in my opinion is a far more better way to find the problematic frequency than trying to boost the EQ and then notching. The reason being that it really isn’t good for your ears and judgement if you do this often especially when dealing with dialogues.
4. Duplicate Backwards
To duplicate a region backwards (forwards is Command+D), use Command+Alt+Ctrl and click with the grabber on the clip.
5. Automation Transfer
To quickly transfer automation from one portion of the track to another, the method below is the one I use. I prefer this over special copy and paste as the selection of the length of the clip is immaterial. For the other method, it depends on the selection you make while copying the parameters.
- Click the source section
- Disable Link Timeline and Edit Selection. (You can also do it from the Options Menu)
- Go to the destination and make the selection to whatever length you need.
- Do a write to all enabled. From Edit -> Automation ->Write to All Enabled
- Re-Enable the Link Timeline and Edit Selection.
You can also see it in the video below.
6. Clip moves and Trim cheats
The next two are my favourites when it comes to setting ambience lengths or to vary for a Pan. Very often if there are beds of traffic and I feel it isnt enough for me to get the spread, what I would do is copy a different portion of the ambience and lay it below the track using Control+Command+V. Additionally what I would also do is use Control and +/- (from the num pad) to move the clip within the selection. It kind of cycles through the selection. Another of my favourite shortcut is if i need to extend the tail of a clip to a point, I make the selection from somewhere at the end of the clip to the place upto which I want it to extend, and then use Command and + (Num pad). This extends the clip if there is length within. To do the same at the left of the clip, make the selection and use Option and – (Num Pad).
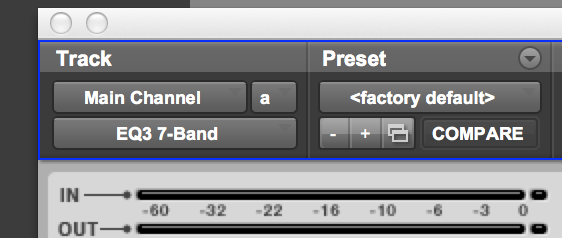
7. Increment Preset
On the plugin window, clicking the small double square below the preset menu will bring up all the presets. Then clicking the increment preset every 1 second will cycle through the presets with the selection if needed in a loop.So, I can play a dialog in loop and set the seconds in this and sit back. When I am happy, I click done.
Plugin Preset
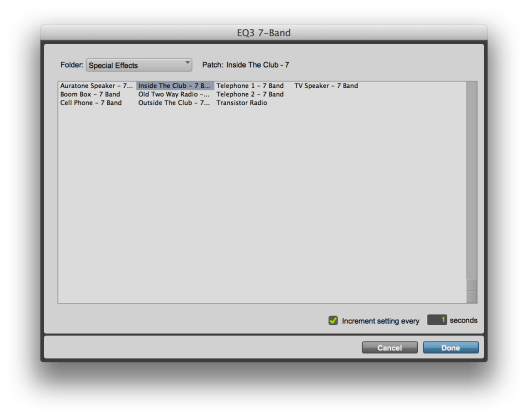
Increment Every x Seconds
8. Creating fill Tracks
On dialogues to create a fill track, doing an extract instead of strip on the strip silence window, will give all the fills. Now, to put them back to back in a single line, simply select all the clips after extract and then drag and drop them from the clip list onto a track with timeline drop order on Left to right. This will put all of them back to back and a cross fade across will give a fill track. Just be careful of the thresholds when doing the extracts.
9. Using Pro Compressor Listen
On the Avid Pro Compressor you can click the speaker icon to listen to the gain reduction happening. I used this in creating what I call Ghost Signals. You can read about it here.
10. Automation in Half Speed
In order to get an accurate automation, I would do a Slow speed play by pressing Shift+Spacebar. This would give me the time to accurately move my panner or eq that I want to do across the line while looking at the screen.
11. Reverse Reverb
Ever since this was introduced in Pro Tools 10, it has been my favourite. Clicking the reverse button on the Reverb, or delay in an audiosuite plugin will give you with a reverse reverb or reverse delay (where reverb or delay builds to the dry voice). An all time favourite and sometimes overused effect.
12. Window configurations with Markers.
I sometimes set up my audio suite plugins in an order from Left to Right in terms of processing order. (For example a cleanup would have RX and an EQ with a multiband in that order). I can then recall this from markers as they can link to markers.
13. Bypass EQ, Compressors, Reverbs
On Pro Tools 11 onwards, you can select tracks and enable or disable the EQ, compressor, reverbs, Delays and Modulation plugins on the tracks using Shift+E for EQ, Shift+C for compressor, Shift+V for Reverbs, Shift+D for delays, and Shift+W for modulation. This is an extremely quick way to A-B the settings you have setup. Also very easy for me because I have a very short tone memory. If you want to by pass all plugins on the selected tracks, then Shift+A will do the trick.
Hope you enjoy them!
-FM

Very useful thanx for the information
What to say about Pro tools…… It’s is great. And it will remain great
Where is “timeline drop order on Left to right”? When I drag multiple clips from bin I get them spread across multiple tracks.
It’s in the clip bin menu on the right. 🙂
the morphing is amazing. Still trying to figure out what exactly is happening via the command etc.
Great article. Much as I am very mindful of the gain staging within my sessions, both music and film ones, I have recently learned that it doesn’t really matter if you overload the bus on a 32 bit floating point engine such as the one Pro Tools has as long as you bring down the level before the final output. What it does make me think of though is all those plugins that do rely on signal level and sweet spots (such as the analog emulations etc). It only seems to work for a very simple signal summing type of scenario. Or say if my stem busses overload a master bus which I can then simply trim.