
This time I will write about how the Effects, Ambience and foley were mixed. There is nothing fancy or new in this but there are some techniques that I used this time. Before I get to that, I would say that all the premixes that I did were by listening to the Score and Dialogues playing back from the first machine. This helps me to quickly workaround whatever clashes that were there. Also what it helps is to find what scene works with the score and what would need to be based on effects. In such cases I would mix the effects with prominence and then Justin, Kunal and I would figure out the scene. But then that too would change based on what The Director would want. By then we already have an idea of how it would work either ways.
The Session

FX Session
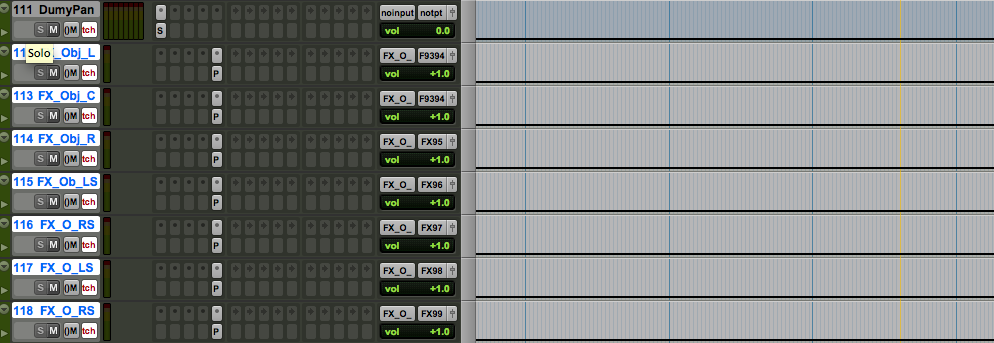
The effects were running from a Laptop with 16Gb of Ram and an HDX2 on a thunderbolt chassis with Pro Tools HD V12. We had close to 200 tracks running at 96kHz. These were original source files recorded at 96k by Kunal and Gokul and not upconverted from 48kHz. Preparing the session involved some effort as we needed to know what to compile and how to group them. Earlier in my mixes, I would route separate auxes for elements if needed. This time, I used VCAs. For example, if a session had guns, ricochets, passbys, hits, breakings etc on separate tracks, then rather than creating separate auxes and use Voices, I would send them to common outs and control them via VCA. If they need any common processing then I would use grouped plugins. My session would have masters in the order of FX, Ambience, Foley, Incidentals, FX Objects, Ambience Objects, FX Bed, Ambience Bed and Crowd. If there are guns etc, those would also be grouped. All of this was discussed with the sound editor Gokul. He gave me the sessions in the required split and this also helped in sorting the session to a manageable one. I was using the Avid S3 to do the fader rides and plugin control and this allowed me to create layouts in count of 16 Faders. They were also color coded tracks.
I had LFE sent through the Pro Subharmonic that gave me beautiful options for different frequency bands that were automated. My go to EQ here was the Fabfilter Pro Q2. This had frequency bands upto 30kHz which was very useful in a 96kHz project. The R2 from Exponential Audio was my reverb. It is a very cool plugin that is absolutely remarkable for non musical real elements like Foley and effects. On the foley I used the RA for a bit more body on the footsteps. Spanner was on all of the Master surround busses that I used.
The Routing involved the SDDS technique I have explained here. The object tracks were placed just below the last track of each section eg Foley will be followed by its Object, then FX and Ambience. One thing to note about the Dolby Atmos system as of now is that you cannot have a gap between object numbers. So if you have FX objects from 20 to 40 and Ambience from 45 to 55, the numbers from 41 to 44 cannot be left blank. There has to be a dummy object or instead of starting from 45, shift those to 41. In our case, we literally had no spare objects and ended up using all the 118 object tracks. This was also because the SDDS technique by itself uses objects for the pan.
Spanner to Object
The above figure shows how I used the Spanner to Object app in my session. Basically the beds would be rotated using spanner where needed. Once done, I would take the individual element like a wind or cutlery in a room (if the camera pans across) and put that on a track that is routed to an output that I called FX_Object_Pan. This bus has its separate elements to object outputs. So, the Subpath L would be in 95, C in 96, R in 97 etc. Each of these auxes will have the Dolby atmos panner with the pan position as L, C, R, Lss, Rss, Lsr, Rsr, respectively. Then by running the app I mentioned above, the automation would be copied into the dolby plugin. Simple! A 2 minute job in less than 10 seconds!
EQ and Compression
I generally cut off the Highs and Lows in a foley track but this time, the production recording was so good that I used most of that and ended up using foley only where it was absolutely needed. The truth is we dont hear every footstep, tap or shuffle. So, there was a lot of rides on the footsteps to make them sound natural and also on the taps. In fact we took off most of them so that it makes the film more natural rather than forced. My major use of the objects was for panning within the field and not for the overheads. One thing we had decided in this movie was to make the mix grow as the film does. So, this is where the accuracy of atmos helped. Very little compression was used in the effects as they were extremely dynamic in nature going from barely heard levels to good ones. We made sure the mids were controlled so that we were able to create loudness without the pain of it. There were sequences that were really difficult to do as it had to be big yet not hurt. I always managed to push it even further by controlling the upper frequencies. One subtle thing this does is it gives a very rounded tone with the attack where needed so that the mind makes up for the missing frequencies.
Panning
If you read my previous dialog post, you would have noticed that I like to have things in the Center Channel. basically my thought is if there are speakers on the stage, use them to reproduce the sound and not rely on the phantom center. This is also why I like to have ambiences panned through the center and never leave it on Left and Right Channel. I am also not a big fan of using Divergence as it means we are simply sending the same signal across channels and not really using the space to be created. Instead its like having a big Mono. So, what I generally do is rely on the Pan Law or use a separate part of the same signal (eg crickets or night ambience) in the surrounds. This gives a bigger separation to the space that is created. A lot of the effects that were MS recorded were also decoded as I had mentioned in the dialog blog post. Another thing that I used was to use the innet Left Center and Right center speaker for the low elements and the LCR for attack and brighter elements. This gave a lot of separation in the sounds and the Atmos Renderer took care of rendering it back to a 5.1 or 7.1 track.
Techniques
Invert EQ
This is one that I used with Nugen Seq-S on the Crowd tracks. What I did was to get a feed of the dialogue recorded, get the Tonal spectrum and use the invert on the crowd with automation on the depth of the EQ cut so that it is not felt that the crowds have a dip while the dialogues can clearly push through without boosting it or lowering the crowds.
Ghost Signals
I didnt know what to call this technique so I named it this way. Basically the idea is to open a signal triggered by another. Of course I could have used a gate, but I wanted the smoothness of a compressor’s attack and release in this. The requirement was in a certain sequence where the crowd sounds would be heard by the character only when he was hit. It would vary based on the intensity of the hit and also the duration of it. I came up with this weird way of achieving it. I used the Pro Compressor with the settings as in the figure.
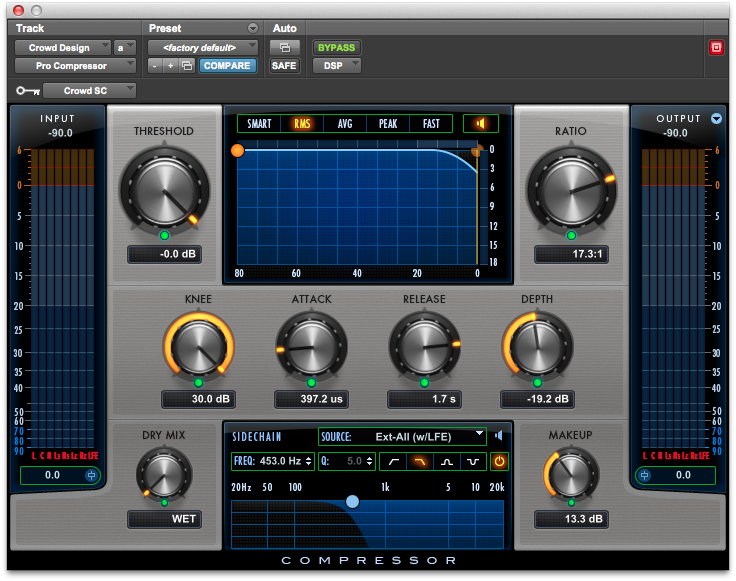
If you look above you can see there is a key signal called CrowdSC and what I did was to switch the speaker icon on. (the icon is just to the right of smart RMS AVG PEAK FAST setting).
How this works is like this. Whenever there is a sidechain the compressor would compress. What this speaker icon would do is play the compression or gain reduction signal rather the compressed signal. It is actually there to know what you are compressing. So this was put on the design crowd track and whenever there was a hit, that came through the CrowdSC, this would play the compression. Adjusting the attack and release gave me the option for a smooth open and close and the Ration gave me gain reduction based on the input signal. So a harder hit had more level of the crowd. This was then sent to a reverb so that it tailed out in the ear of the character. So the effect in words is as he is hit he hears the crowd open and die out for that one moment with reverb. It sounds very surreal but is actually something that would happen in a fight.
Apart from this, it didnt really change what I did in my earlier notes except in the mix where some more things were tried out. Some of the scenes like a moving car would have a mondomod process on the car sound to give the sense of vibration to the sound as you would have in a car. A lot of the effects were done to match the music which is why I used the score while premixing. I got a rough sense of the tempo and used that to set my pre delay on reverbs for musical scenes so that the effects and the space feel part of the score. It was also easy for me to fit the effect within the space with minimal rides in this case as it blends more easily. There were places where we treated the effects and blended them into the score so morphing the transition from score to effects to score. The LFE I mentioned was not present in the BGM while Justin mixed it and it was left to the Effects to compliment that.
Next time notes on the Final mix. Till then enjoy and take care!
-FM

Pingback: Pro Tools shortcuts for the Film Mix Ninjas | Film Mixing and Sound design