
Tags
This time, I am going to tell you how I approached the Dialogue Mix. This film is quite an experience for me and frankly is the most complex film I have attempted to mix. While like all films, the dialogue plays an important and central character in the movie, the dynamics of it is so much that we had to figure out many ways to make it sit in the mix without the listener knowing that something was raised or lowered. Of course, all seasoned Mix engineers have their techniques and something that works for them. I will be talking about what I do and what Justin later does.
The Recording
During Gangs of Wasseypur, Kunal had recorded some tracks using an MS technique (Mid-Side where the sound source can be captured as a true LCR with the Middle and the Side images. More info here.) At that time, after decoding the MS to a stereo, I used the Dolby LtRt Decoder to decode that stereo into LCR. This time, he went ahead and had captured multi MS with a separate one for Crowds. So, there was a forward or camera perspective and a rear MS for some cases. The recordings were on a Deva and at 96kHz.
He also had lapels and booms in the location. The idea is that we always have a camera perspective of the shot with the MS. If we want to get close, we have the lapel and if we want the room and overall tonality, we have the Boom. I always mix them together with the balance needed to maintain consistency. The recordings were clean and I can happily say that around 85% or more of the movie is location sound. The only ADR that was done was for creative decisions or in some really challenging sections.
Dialogue Editing
This was Zahir’s forte. One of the challenges was that the Avid Media Composer was having challenges editing using the 96kHz audio. They were down converted to 48kHz. The Pro Tools Session was then reassembled from the EDL using Synchroarts Titan. The most challenging part begins then. What takes to keep, what to ADR, how to clean, creating the fill track, splitting the Production Effects into a different track for the MnE etc etc. And all of this keeping in mind the requirements for a mix stage of track arrangements.
He had supplied me with the tracks assembled as Boom, Lapels, MS, ADR, Production fx (PFX). One of the most important thing to look and realise is that the Boom and the Lapel will differ in phase. It is not always 180 degrees. This is also important because the tonality will change and that is not something that can always be corrected with EQ.
The Mix
I have a confession here. The first reel I start off will never be the perfect reel. It is true because it takes some time to set the tone and the signal chain. By the time I am on the second reel, I usually have a good idea of this and then go back to the first one after a few reels. There is nothing wrong in not getting it right the first time. This used to be a stress for me initially but now I have gotten around it. The first thing I do is listen to the dialogue on the first reel. I have my EQs and Compressors ready at the factory default for EQ and 1:1 ratio for the compressors. I dont want them to act out just yet. I also have my reverbs and delays set up in the session and leave some space for any crazy thing I might do if I strike upon an idea in the middle of the night! There are somethings I look for in this run. I have a detailed writeup here and here and not much has changed in the overall workflow so I will write about the additional things I do.
MS Decoding
The ambience and camera perspective of the shots were recorded in MS too along with the Boom and Lapel. What this gives is a very clean space of the location. Including some very beautiful Room reverbs, Exterior slaps, exterior reverbs etc. But the issue with MS is that it is decoded in stereo. The center element is made from a phantom center. I came up with a technique to decode this. If you remember the mix notes of Gangs of Wasseypur, I had briefly mentioned this technique. What I did here was to take the MS Decoded track and run it through a Pro Logic II Decoder from Neyrinck. What this does is essentially treat the stereo as an LtRT track and generate a 5.1 from it. This means the Camera perspective will be accurate in 5.1 and the Rooms you will hear in Bombay Velvet are the Real rooms of the location and not heightened by reverbs. Reverbs were used where needed and for matching.
But Kunal went one step further and recorded Dual MS in opposite directions. One facing the Character and the other the other way. What we did in the Mix was to decode both and flip the rear MS Pan so that the LCR is actually along the Back Surrounds and the Ls Rs would be along the front. When combining these two tracks, the space in the theater is amazingly real. Not just that, when there are crowds or characters falling off camera or talking and walking away or even having car passes, they are real and you get the sense of being in the location. To this, we added some subltle voices and crowds as objects to make the feel even more real by matching camera pans and panning these across the speakers.
To summarize, the Beds will pan automatically due to the recording, the ambience will be spannered and the real feel of the individual speakers will come from the few objects that create the realistic feel.

Decoding
Dialogue Matching and EQ
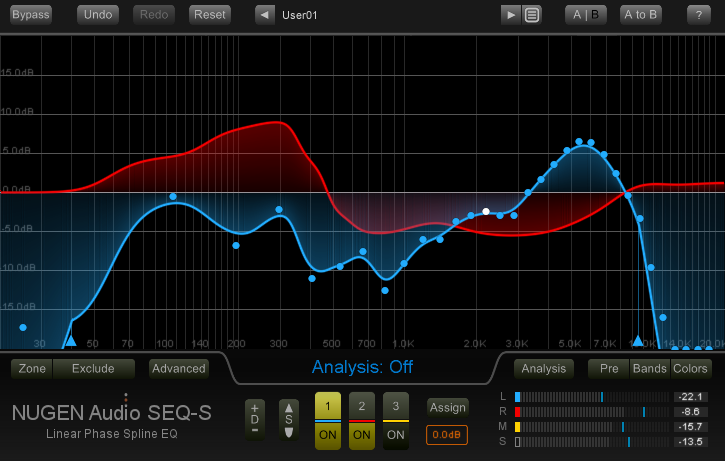
This is a very important aspect of the dialogue premix and what takes the most amount of time to achieve. What I used was this beautiful AAX plugin from Nugen called Seq-S. This is my go to tool and my not-so-secret tool. This is a linear phase EQ. This means that there is minimal shifts that will happen when an eq match is done. This is most noticable in the lower spectrum if done with a regular eq. Especially if you want to match something in a Room or an exterior shot. This Magic plugin takes all the burden out of the job and goes one step ahead by letting you decide how deep or accurate you want it to match. Sometimes you dont need the accuracy because the shot changes will require you to have that slight difference.
But that is not the only place this shines. It is an amazing tool for invert EQ. If for example I want the dialogues to sit within the crowd without lowering the crowd or music, I can take the spectral sample of the dialogues, and apply the INVERSE on the Crowd or Background. The depth setting also allows me to decide how deep I want the dialogue to fit in the range. Because it is a very complex filter and linear phase, it lets me fit it with just the precision I need and not letting the listener feel that we have cut out frequencies for the mix to fit.
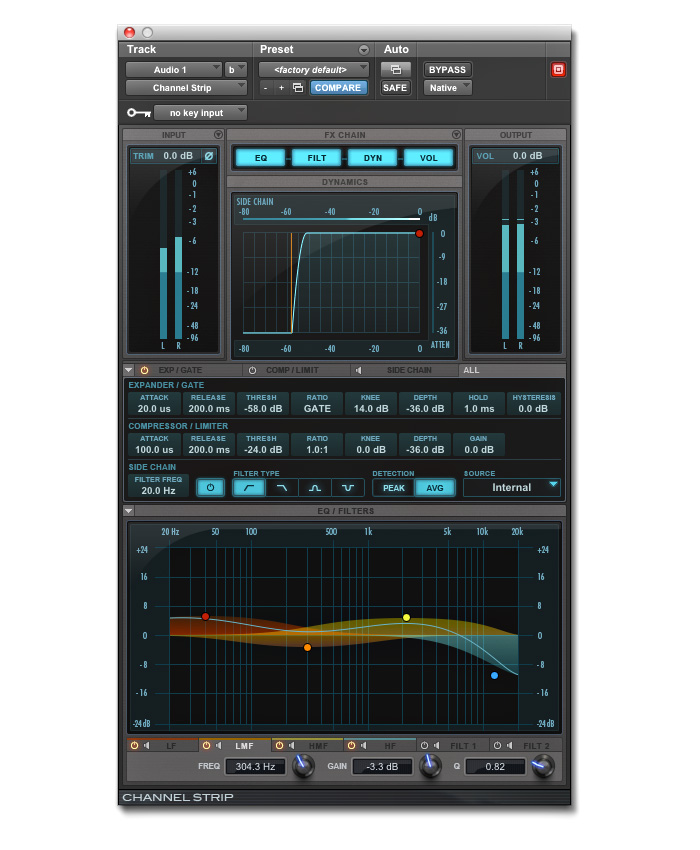
My Go to EQ for notching and tonal shaping is the Channel strip from Avid. This plugin is infact an exact replica of the Channel strip of the System 5. This means we get the sound of the large format console right here on a Pro Tools System and its free. It also doesnt take a lot of resources and can easily sit within the mix.
Channelstrip
The Oxford EQ was my clarity and bass EQ. The reason I took this was this is the only EQ that I know (other than the MDW) that has frequencies upto 40kHz while on 96khz sample rate. (Remember Nyquist Theorem?) What this also gives is a very clean sheen and finesse to the track without the noise floor being pushed up.

Sonnox
Reverbs
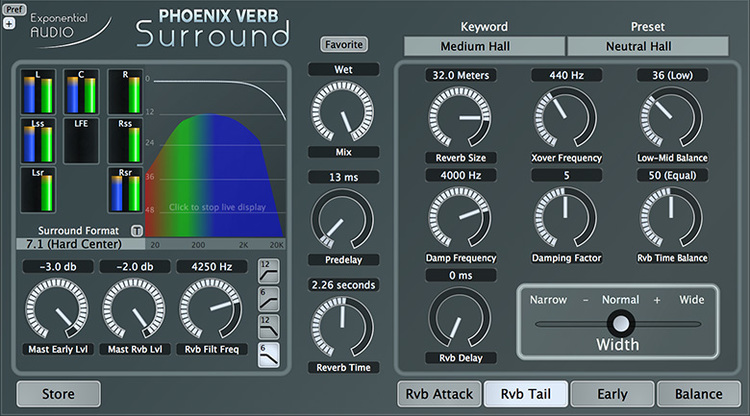
I have two reverbs that I frequently use. The Revibe and Phoenixverb Surround from Exponential audio. The Phoenixverb has a setting called 3D. What this allows us is to link two instances of phoenixverb and assign one of them as the bottom bed and the other as a top. This is also quite good for Auro 3D format. Now, what I did is to have the 7.1 and a stereo setup and linked and the stereo would be routed to the overheads. This gives a very realistic overhead reflection and creates the space very well. The revibe is my instant reverb for slaps and halls. Although the Phoenixverb was what was used in this wherever the dubs were to be matched.
Multiband Compression
My new favourite multi band compressor is the Pro Multiband from Avid. This is a hybrid plugin in that the algorithm is processed on the DSP of the HDX card while the graphics on screen is taken care of by the CPU. One thing very interesting about this is that the crossover filters are linkwitz-riley 8th order filter. Thats a very strange word to hear if you havent understood what they do. Essentially a band is made by a set of 2 filters that have a level drop over a frequency range. So, 6dB per octave at 100 Hz means it will drop by 6dB at 200 Hz and 12 dB at 400 etc. Now these shelving filters will cause a phase shift depending on the frequency you are applying it at. It is important to know the filters and their dependency on the signal level.
Essentially, phase shift is delay. The reason it is in degrees is because the delay time is dependent on the frequency. So when we say like 180 degrees phase shift, it means
Phase = freq*360 / (time delay).
So in this though the phase shift is fixed for a type of crossover, the time will change for frequency. A Linkwits-Riley is actually 2 butterworth filters in series. This is why LR filters are only even ordered. (2nd order, 4th Order, 6th Order, 8th order etc). The phase shift is order number * 45 so for 8th order it is 360 degrees.
This should not be confused with 0 degrees because 360 degrees in the above formula will give you a different time of arrival for THAT frequency. This will be different for other frequencies. So, addition and subtraction will vary.
What is also interesting is that the slope although is 48 dB/Octave, the frequency is dependent on input signal level! That means if you push the signal, for example at 100 Hz, the level is calculated as 100 Hz will be -6 dB and 200 Hz will be -48 dB. But this is provided the signal is at 0 dB. If the input is increased by let’s say 6 dB (easy for calculation) then at 100 hz, the level is 6-6 ie 0 dB! This means the center frequency is no longer 100 Hz but 110 or so. Because that is the frequency at -6 in this case. 🙂 -6 is the value because for the Linkwitz Riley (LR), the center frequency is the one that drops by 6 dB. The advantage is that when you have a High pass and low pass LR the total drop is -6 at the crossover but since acoustical summing of 6 db happens it becomes flat. Acoustical summing of 6dB always happens at all crossovers. If we used a 4th order LR filter instead, the total drop will be 3 dB so at the crossover the signal will be 6-3=3dB more. And this is why splitting the signal with the multiband splitter plugin and recombining it doesnt produce any change. Its the 8th order LR advantage!
This is also why the middle bands are called floating bands and not crossover bands because for crossover band it needs this summing to happen while we can decide the mid bands and slopes in this case. Also floating bands are defined by the center frequency unlike the crossover frequency which is defined by the dip. One thing in the C6 is that you can screw up the bypass state. If you bypass the plugin, adjust the crossover frequency and then unbypass and bypass again, the signal changes! This means it is not a true bypass. It still runs the signal through the plugin filters and recombines them; and just bypasses the individual bands and because of the filter property we just saw, it can introduce phase issues even when it is bypassed!
I know some of this may be a bit difficult to grasp in the first read, but this is also what is very important about these compressors. If you try parallel compression and then get phase issues, you know why. In addition, it is also useful to know why sibilance and some frequencies suddenly jump up when doing a level ride into a multiband compression. As you see above, it changes the band itself. All this being said, this is by far the most transparent Multiband I have used and is going to be my weapon of choice for a long time.

Revoice Pro
An amazing piece of software made by Syncroarts. This is what saved us a ton of time in matching takes. Not only does it match intonations, it can also tune pitch and energy of the Dubs against the Location. A brilliant piece of work.

Analog emulation
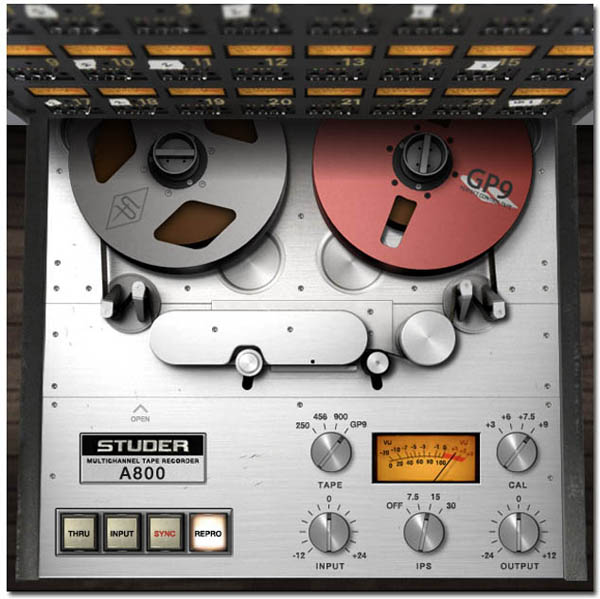
This was the most difficult and time consuming part. Our constant companion was Heat from Avid. This is a harmonic enhancer made by Dave Hill from the designer of Cranesong. Once we had this on our mix session, there was no turning back. It had to stay. Our next step was analog emulation in some parts for which we used the UAD Studer A800. This added that missing element to the body of the dialogues when we had cleaned up certain sections. It was also something that gave us so much warmth on very close shot and intense dialogues. That being said, adjusting the latency was a bit time consuming and yet we preferred to use this in portions of the movie. The other plugin on VO and other characters was the Reel Tape Saturation. This too was something that wouldnt work on all characters but when it did, it was amazing.

Once I am done with my premix, Justin then takes lead and tone shapes the dialogues to blend with the score. He uses a combination of EQ, Expanders and DeEssers in his chain so that the tone that needs to be attained sits well within the mix with no sibilance or annoying bumps that may creep in when the dialog levels will be changed on the demand of the scene.
Thats all for now. Enjoy the week ahead. We have a lot more work ahead of us! Till next time!
-FM

Pingback: Bombay Velvet – Effects, Ambience and Foley Mix | Film Mixing and Sound design
Pingback: Demystifying a Film Mix | Film Mixing and Sound design