

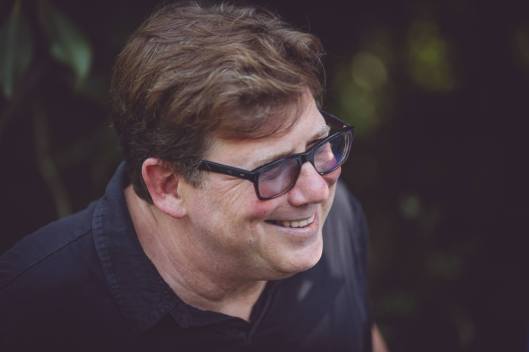
Last week I had the best time of my life when I was able to spend a week with Alan Meyerson, who is known to be one of the greatest scoring mixers of all time, and one of the very few who can make a dent in the universe when it comes to Surround Mixing. He has worked with composers like James Newton Howard, John Powell, Harry Gregson-Williams, and Danny Elfman, and has a particularly long-standing working relationship with the great Hans Zimmer that continues to this day. So, if you have loved Dark Knight, Kung-fu Panda, Inception, Interstellar, Pirates of the Caribbean, Gladiator, Captain America: Civil War, Da Vinci Code, and many more of the 200 plus movies he has worked on, you would instantly know who I am talking about. A legendary mix engineer, recording engineer and above all, an amazing human being with so much patience, passion, and dedication to sharing and making things better.
This time, the blog is going to be a very exclusive talk on his philosophies when it comes to a surround mix, his techniques about how he mixes, how he works with Hans Zimmer, and in general, gets stuff done. It is about getting into the mind of one of Hollywoods legendary surround mix engineer. But, all said and done, there is nothing like learning from the master directly. It would be a conversation with Alan on the questions that I thought were relevant especially in the film world where there is very little written about music mixing for surround.And I would highly recommend having a look at https://mixwiththemasters.com for this. I haven’t come across another website that would change the way you would listen, mix or record. There will still be a lot more notes and techniques remaining that I haven’t written here, for which I would highly recommend the masterclass.
The Conversation
FilmMixer: Alan, how do you approach a surround mix?
Alan Meyerson: My approach is to mix and get the balance as fast as I can and then polish the mix with EQ, compression reverbs etc. I rely on getting the placement of the instruments right. My philosophy is “Don’t build mixes in the middle”. That is where the dialogues are going to reside. This means that I would be competing with that and in a situation like that, music is always lowered. I don’t want that to happen. I always make my space around it. I look to make two balances right – the Spectral Balance and Positional Balance.
I care about the imaging for the person who is not sitting in the middle of the theater (the sweet spot) to have as much of a sonic experience too. So, I have my positionings done accordingly. I would definitely use the center if it is needed. For example, I would have elements with low frequency like the Bass or the Kick Drum all across the Left, Center and Right speaker, so that it has an equal strength. The way I pan is based on my listening and understanding of how a classical orchestra is placed on a stage. I try and maintain my pans for that. But there have been changes that I do for creative purposes that suit the movie, like when I was recording and mixing for a film some years back, I had the orchestra duplicated into two sections mirroring each other in a room. I then had the orchestration written so that when they were played, the parts and movements would be split between them so when you record, you get this amazing image of the music moving. That would be impossible to create if I were to pan things around. There would be a human factor in it with the orchestration.
I also don’t do a lot of half pans or pans that are between the left and left surround or right and right surround. I am not really comfortable with that. I have specific sounds for the surrounds and the front. The reason is, first of all, I record my orchestra with that in mind, using wide mics and surround mics. So, the imaging comes up naturally. Hans, for example, has all his samples in Quad (Left, Right, Left Surround, Right Surround), so that too is taken care of. Apart from these I also have a few techniques that I use my Bricasti M7s with. I have 6 of them, but I use 3 in a stereo mode in a very special way to create depth and imaging.
For me, its is always about the imaging. If the imaging isn’t right, it isn’t really possible to clear things up with EQ or Compression because you are trying to clear a crowd rather than spreading it. In that respect, it is important to understand to keep only what you need. So, if there are a lot of things fighting in the lower range, I remove stuff to see what makes it clean. Sometimes, masking would make you feel that there are other frequencies that are not being heard and you would be eqing the wrong instruments. For example, a gentle roll off on the highs of the tympani would give you a good space for the high hats if they play at that region. Sampled sounds almost always have a bump at 250 Hz and 2.5kHz that I take off. So I get the space for the frequencies to reside. I then balance the elements amongst them to get it right.
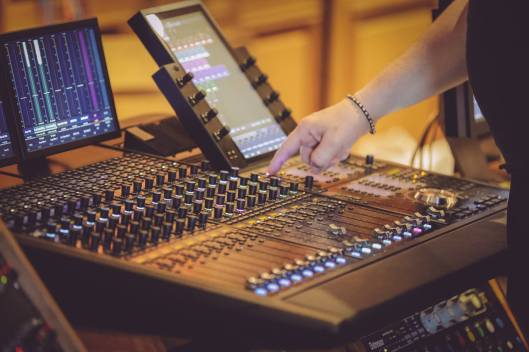
My entire mix is in the box currently and I use the Avid S6 to achieve it. The only out of the box stuff that happens is the Outboard gear that I have. It is also very important for me to have all the things happen quickly. This also means one has to be very disciplined and know what he / she wants to achieve. I don’t really lose the sounds from not using an outboard, but in fact gain much more, as the plugins that are available in Pro Tools today are fantastic and do a stellar job. Plus, the cost and less pain of patching and assigning everything in the out of the box mix, and to note and remember that, is all a thing of the past!
FM: You have a very good control on the LFE channel. How do you use it?
AM: I mix in such a way that I don’t take the support of the LFE for the music to be full. Remember, the main speakers on the stage are full range and with Dolby Atmos, the surrounds are too. So, I want my mixes to sound good even if the LFE is turned off. And many theaters, unfortunately, are not calibrated or have no set level for their channels. This makes me be very careful with the LFE. Plus, I do a lot of action movies. Some of them like for example the Pirates, or Dark Knight have a lot of low-frequency content down there and if I have my music too, then on the dub stage, the first thing that is going to be sacrificed in level is the score. I don’t want that to happen!
I don’t use tonal sounds in the LFE, as I don’t like the way they sound. They can also sometimes resonate differently in different rooms, but then that’s just my personal opinion and me! Yet for orchestras, I do record the low frequency and I send that to the LFE channel with some processing using a Lowender, or an Rbass on it. The lowender is my current favorite for this, as it tracks the pitch of the signal very well compared to the others.
I also change my LFE speaker levels in the room I mix sometimes. I send the signal to the level I want to on Pro Tools and adjust the speaker gain to get it sound right. I know it is not scientific, but that has worked for me in many situations.
We also get the FX predubs (premix) while we mix the score so we know that we don’t fight it. It is also very useful for us, as sometimes we may notice a ship horn that is out of key or a lot of sounds design has tonal elements, etc. In big budget films, by the time we were mixing the score, the Sound Effects are complete, so we have a final sound design to work with. This also lets us know if something is not working with effects and we heed the help of music or vice versa. It is a very organic and communicative process.
FM: Your choice of reverbs and the way you place sounds is impeccable. How do you choose and place reverbs?
AM: I look for reverbs that are not honky or too bright. I also don’t like to EQ reverb returns. But I do roll off the low and high frequencies to the send of the reverb. This is important so that the reverb doesn’t become cluttered. There usually is a lot of low mid and low-frequency buildup that happens in a reverb. I don’t want to add to that with sounds that have it in the first place.
I always have multiple reverbs. When I choose a reverb, I am not trying to match the room in which the orchestra was recorded. I am trying to build an extension to that room. This helps me to glue the mix and instruments together to sound as if they are part of the same music. Many times I have seen multiple reverbs used and they end up being eq’d very drastically to make everything fit. I try and minimize the work I have to do. I also sometimes use longer reverbs to extend the notes, a technique I like to call as “feather the notes”. This is very helpful especially on the end of notes where they sometimes have the tendency to tail off faster or drop away. I also use multiple reverbs per stem and have the stem reverbs independent. So, my strings would have a set of reverbs, brass another set, percussion another etc. This gives me a lot of space to play with and build the movement. I don’t like having a static mix. Music has to move and the instruments have to play in the space and interact. So multiple reverbs help me with this.
I also set up a separate reverb for front and surrounds. The easiest way I do, (and there are a million ways of doing things!), is by having a reverb aux set for the front, then duplicating that aux and varying the parameters like depth or predelay for the surround. I don’t use a lot of changes in the predelay, but then every rule is meant to be broken with an understanding! Sometimes I add an Echoboy or Devil Loc in a separate reverb return to give it a slightly different movement and tonality from the main reverb. All this is done keeping in mind that the sound isn’t disconnected. The idea is to make sure the instrument is glued to the mix.
My go-to reverbs in the box currently are the Exponential Audio R2 Surround, Valhalla and the Eventide 2016. The Eventide has a front-back adjustment that I use a lot to place some instruments further back in the mix. I also sometimes use these as the difference in the front and the surround reverb. I tend not to use convolution reverbs for the general reverbs purely because the predelay or the sounds are not created but made by pushing the sample further. It doesn’t work in cases especially for general reverb for me. For the hardware, I love the Bricastis especially the mechanics hall preset and I have a unique way of routing these.
The routing may seem a bit complex in the beginning, but I have that little mixer built within Pro Tools with Auxes and set up so that I don’t recreate it from session to session. The way I use it is, I send my entire orchestra stem to this. I split the orchestra into L, C, R, LS and RS. These are fed individually to the Bricastis. I use 3 of them and call them Bri1, Bri2 and Bri3. All of them receive stereo input and send stereo output. The returns from the Bricastis are what do the magic for me. Bri1 output 1 and 2 is panned to the Left and Left Surround. Bri2 output 3 and 4 is panned to Center and Back Surround (though I don’t use the back surround and have it muted or not routed). Bri3 output 5 and 6 is panned to Right Surround and Right. Yes, it is inverted compared to the Left one.
My sends from the individual channels are panned in such a way that the left orchestral channel is sent to Bri1, Bri2, and Bri3 but with different levels. The Pans are also such that Bri1 from the left channel of the orchestra receives more towards the left than the left surround and so on. On the right channel, this helps give a spread to the orchestra since I recorded the stage in surround and the inverted return gives me more depth on the space. I also play with the levels to the send and return of the Bricastis because I like movement in it. The reason this idea came to me, is because I have felt the way the reverbs work when you have a signal on only the left or the right and the way they create a stereo output is very interesting. There is some interaction with the pre delays and the reverbs that give a unique positioning to the sound. My favorite go-to reverb setting on this is the Mechanics Hall setting.
While this is what I do with the entire orchestra, I also have sends for reverbs from the tracks I record. I almost never send reverbs from the spot mics unless it is really needed. I also don’t tend to use the spot mics a lot unless I want to highlight a certain instrument in the mix. That being said, I sometimes mix with the score to help me read the instruments and what they are playing for. Now, when I send to the reverb aux, I send it from my room mics. I get a lot of body from them and use that to extend the room rather than trying it with the spot mics, because they don’t usually glue well in the mix that easily as they have more mid range content. I sometimes add a devil loc or a decapitator in the return of the front or surround reverb just to give it a bit of grit and definition. I tend to like the AMS Neve RMS16 Reverb on the UAD for which Program 8 is another of my favorite with 20% blend.
I don’t use the Predelays on the rooms and never use it to place the instrument in space. I use them only to get a definition for the reverbs. And for a long time, the New York pop world predelay value was 120 ms. (Just like the 200 Hz and 330 Hz cut were very popular!) That is what I use for most of the predelays to get that delay a bit separated from the main sound if I want it as an effect in a dense mix. I also like the D-verb quite a lot especially on bells and such instruments.
FM: How do you begin a mix? I am a dubbing mixer and may probably have a different approach to beginning a mix. What is it that you start with?
AM: My approach to a mix is quite simple actually. I do 90 percent of the work in 10 percent of the time and the final 10 percent in 90 percent of the remaining. The reason for this is I want to get my balance as fast as possible. This allows me to think about what I can do to extend the mix rather than trying to fix the mix for the main part. I am a firm believer that the spectral and positional balance must be right. The first thing I look to is to move instruments out of the way with the position. I use a lot of techniques to achieve this widening. One of my favorite tricks is to make use of the Haas Effect. So, if I have an instrument that is stereo in track but a bit mono in sound, I delay one channel of that track by usually between 150 and 250 samples. I use the time delay plugin in Pro Tools for this. What this gives me is an apparent shift in the position of the sound in the stereo field without doing a pan. When you do a pan you are taking the information in that channel and feeding it to the other. This doesn’t help much and rather than making it wide, it makes it narrow and shifted to the other side. Using the time delay method, I can move things out of the center without sacrificing the level on the channel. The ears and brain do the rest of the work. This is the main trick in my arsenal to help position the sound. I also don’t use the center channel a lot as it narrows down my mix. Instead, I reduce the center percentage on the panner in Pro Tools and spread it across the Left and Right and use the Haas delay technique. This gives me a lot of space to place the other instruments.
Once I get all the instruments placed, I adjust the levels. I very rarely EQ or compress individual tracks unless it is really needed. I build my session with stems through Auxes and VCAs. The Auxes are the ones that have the EQ or the compression or harmonic exciter on it. Not the individual tracks. This helps me focus on the mix much faster, and when you are dealing with more than 1000 or sometimes more than 2000 tracks, this saves a lot of time. Otherwise, you could go on till the end of time trying to fix things individually. I also make sure my balances are right from the moment I record my orchestra. This too saves me an enormous amount of time and also rather than trying to create an orchestral performance from faders, I have real people playing it. It brings a human element into the mix and creates another way to have the dynamics right. This is also why I mentioned about the 90 percent work in 10 percent time.
I also have a 20 percent rule. When you are EQing or processing something, do it to a setting you like and then back it off by 20 percent. The reason this helps is when you are adding tracks over tracks and everything is processed to a 100 percent satisfaction, the overall sound usually won’t be. So I back off and let the tracks interact to give me the 100 percent mix.
FM: I have heard and now saw you exceptionally fast in getting a mix done. Do you have a stem mastering process? How do you do this?
AM: I am pretty fast in getting my balances correct. Once that is done, it is really easy for me to dive into the mix elements and change or correct what I feel is not sitting well. I rarely change the mix from the reference. The reason is that reference is what everyone is used to and what the director, music composer, producer etc. approve. If I change drastically from that, it may not sit well in the whole mix of the movie. I am a firm believer of not convincing a client of something they don’t need. I know I am in the service business and my job is to help the client get a good representation of his ideas in the cleanest and best manner. It is not to impose my ideas on a creative level. This is very important to me to maintain a good relationship and communication.
So, once I have my stems and levels set and my sounds were done, I proceed to do a final mastering on my stems. I use the Kramer Tape from Waves and Manley EQ from UAD to achieve this. I also use a tiny bit of limiting with the Fabfilter Pro-L to take care of the peaks. I make sure not to deliver stems that are too hot. The reason is, when the dubbing mixer takes my mix and puts it on the stage, he needs to have a leeway to play with the fader. If my mixes are too loud and he has to pull the fader way down, then there are not a lot of fine rides he will be able to do at that fader level. So, I make sure to let them have that space to play with.
I also listen to my mixes on the dub stage when I can. I had done some films with Andy Nelson who is a wonderful mixer. We both felt that the surrounds were a bit low. So what I ended up doing was to have my surrounds at Remote Control set to 79db SPL and the fronts to 85. This gives my surrounds a 3 dB boost when it reaches the dub stage. (Their surrounds are calibrated to 82). I also don’t automate or ride the individual instruments a lot unless it is to create dynamics in the passes. There were times when we had to match the reference mix exactly with the movements in the strings. For example, Hans had done an amazing string section that he had programmed. The director also wanted the orchestral recorded strings to match those exactly. It wasn’t an easy job at all because the rides were programmed and were very dynamic. One of the guys at Remote Control managed to figure out a way to convert Hans’ Velocity movements in midi to Pro Tools fader movements and we managed to match it with me polishing the mix. So, there are times that things can become challenging and a mix is always about finding the best solution in the least time possible.
FM: How are your sessions made and the tracks delivered to the mix stage?
AM: By the time I have my mixes done and sent to the mix stage, they just replace the temp mix audio stems in the session. The easiest way my assistant John Chapman has found was to rename all the deliverable wav files to the exact name of the cues they had in the temp mix. So, if they had perc1, perc2, strings1 etc., he would name it in the same way and deliver wav files. The reason is that they can simply remove the existing wavs in the stage and do a relink by name. This would help the files automatically fall into place without the music editor having to rework the entire edits. Also, if they previously did the edits on the stage, this new clip would just fall into place with the right way. It may not work 100 percent of the time but does 80 percent and that helps save 80 percent time!
Recently for a movie, we delivered all Quad Stems for the Samples, 5.0 for the orchestral score and a separate LFE track because that’s what was needed in the Dub stage. It is important for me to be able to deliver what the Dub stage needs but at the same time I have a good relation with the dubbing mixer so that the mixes don’t go haywire and the integrity of the sound is maintained.
Regarding my sessions, I have a session per music cue. I don’t combine cues in one session. This helps me focus on the sound and also I don’t have to worry about what is later in the session. It saves me from automating a ton of parameters within the mix. So how I do it is, I have a sound that I build for a section or cue. John then makes sure the Auxes and sends are all set for the remaining sessions so that I don’t have to recreate the sounds. I can’t say that I begin with the first cue in the film, as usually, that isn’t what the main sound of the movie might be. I watch the movie and listen to all the cues and begin working on what I think would be the main part. I then progress from there into the different cues and sessions. So, if a movie has 95 cues, I would have 95 sessions with each version edited and synced to picture. Once the mix is done, John then combines all the stems reel wise and makes the folder for delivery. This method also helps us with being able to deliver changes to the mix without changing stem names so that it’s much easier for the mix stage to manage those cues in the session in the heat of the mix.
When it comes to Dolby Atmos nowadays, I deliver additional tracks that I record from a wider side of the Decca Tree arrangement. These tracks are sent to the screen wide channels, which are the speakers between the spot in Left and Left Surround and Right and Right Surround. Since these are objects and not part of the bed in Atmos, it gives the mix a wider angle to the orchestral recordings. And like I said before, I am all about a wider mix. I always strive to give space in the recordings and the mix. Although in my room I monitor it by sending it to the surrounds, I have been visiting and talking to my friends who are dubbing mixers and have now got to a point where I can understand sonically what would be good there.
FM: A film mix can get really intense and heated. Do you find yourself in such situations and how do you calm yourself down? This would be a very relevant question for many of us!
AM: Like everything, a mix can be a very enjoyable thing and a very exhausting thing at the same moment. You would sometimes find yourself working towards the deadline not knowing if you would make it. I keep reminding myself that it would be ok and we would make the deadline without compromises. I let the adult talk to the inner child in me. This is very important. As a creative and technical person, you can undergo massive amounts of pressure. These can just be from people trying to meet deadlines or changing timeframes because of things not in our hands. It doesn’t help to be stressed. I try to breathe and calm myself in situations like this. I also call up and talk to friends that I trust and rely on for advice, or just a chat to calm down. It’s also good to be silly sometimes as that can take your mind off the load and reset it to go back to working in full capability. We all have that time, to be honest, but it’s also about how we manage it and manage it with the client.
I also try to take breaks as often as I can between mixes. But that too is mood dependent. If I am in the zone, I mix as long as I can because I usually forget to take a break and I also don’t want to break my creative flow. I then end up remembering my back hurts and I need to get up and stretch or so. And remember, stretching is not breaking your knuckles!
FM: Do you have a reference mix for surround you use when you go to a new room?
AM: Not really, no. I don’t have a reference mix for surrounds as I almost always end up working in my room in Remote Control and I know that room very well. But if I happen to travel out to other studios, I will travel with my speakers. I know that the room may translate differently, but I know my speakers and would take a mix that I have worked with.
FM: How do you listen to other engineer’s works especially in the film world? Do you end up just watching the movie or have access to the score to listen?
AM: I have huge respect for engineers like Dennis Sands, Shawn Murphy, Simon Rhodes, Al Schmitt and many more. The important thing is to have a respect for each other. This opens up pathways of communication and collaboration. So occasionally, we would call each other and talk about the sessions or even help each other out if needed. Then I get to know what they are doing and exchange new ideas. In fact, Al called me for his Big Band recording and I got a lot of ideas about micing from that. For example, I never used to close mic. But after watching Al do it, I might start doing it too. It is also good to constantly update yourself with what’s happening around you, whether its plugins or techniques or mixes or even just ideas. This is what keeps you inspired and fresh to try out newer ideas.
Engineers like Gary Chester and Ed Sprigg mentored me. I learned a lot from Gary. He taught me to be fast and be able to communicate effectively with the client. One of the first things I learned was to be able to create good headphone mixes for the recording artistes. When they have a good headphone mix, they get inspired and give a much better performance. It is also important to read the room and the people. That’s the fastest way to communicate. Ed Sprigg taught me techniques to use the room for the sound. He used to have ways of using the room for compression and bringing out the sound not only from the instrument but also the room. This was a big lesson for me and I still use a lot of techniques that stem from it. I also learned not to judge myself. I do my best and let it go. If I keep thinking whether it is good or not, and second-guessing, I will never be able to finish the mix. I need to be able to be happy and understand I have put my best into it.
FM: What do you do differently when you mix for TV or Video Games?
AM: It is not a big difference today. For example, I mixed the score for the TV series called Dare Devil. It was huge fun and I listened to them on my headphone as well as my laptop in addition to the studio monitors. That’s because I need to check how it translates in these mediums too. I try not to keep a lot of low ends in the TV mixes. This is just so that I don’t end up hitting a compressor with signals that aren’t really heard. One of my techniques is to use MaxBass on for the lows. What this does is to create an apparent low that will be translated very well on small speakers too. Video games, on the other hand, have scoring sessions that are as big as films now. For example on Halo, we recorded orchestral music some of the cues with multiple passes. They were done in 96kHz. I deliver the stems to the gaming team that then make use of those for creating the in-game score and finding loop points etc. I don’t eq or limit them beyond what I do for film scores. They would sound as grand as a film score, as I spend the same amount of time doing it.
FM: Speaking of time, how much time do you spend on a mix?
AM: That varies according to the movie but on an average, I complete a Reel of a mix in 2 days. (A reel is 20 minutes of the movie). I also know that the beginning reel, then reel number 3, and 4, and then the final reels are the ones that have the most work. It is like a performance with the rests and the dynamics within it. I spend the time to set up my sounds first. Once they are there, the mixes happen much faster because I know what I want to achieve and can proceed accordingly. Remember, not all projects are equal. There are challenging ones too. But in the end, I know that all of this will be totally worth the effort. That is important because the challenges and struggles are what you will remember when you have an amazing result in the end.
FM: I am not a recording engineer, but I still should ask you about your techniques of recordings. Especially knowing that you are known for having some of the best orchestral recordings. How do you achieve it?
AM: I record everything in surround. I have an idea of the way the score sounds in the temp ones and they are usually in quad or surround. I also record solo instruments in surround. But if it were just a guitar that’s strumming, I wouldn’t record all the mics. I would still record the room though as that is what gives me the character and placement of the sound. The reason I record like this is because I want to get the orchestra sound and placement the way it is. I sometimes do change the positioning, if I want to experiment with some unique sounds. So like in the earlier case of a film, both the orchestras were placed in the same room and were miced in surround, and in addition, the room was also miced in surround. This gives me a very good imaging of the orchestra. I do spot mic the violins and the horns, but I rarely end up using it. I have a Decca tree at around 12 feet height and another at 8 feet height. I have additional wide mics at the 8 feet height but around 12 feet wide from that Decca tree. I like to look at the orchestral recording in layers of heights. This helps me achieve a really good depth in the mix. For space, I can blend in the 12 feet and for the body the 8 feet. The wides are sometimes sent to the Atmos Screen Wide speakers. I own the Grace Preamp with 32 pre’s. I like them because they also give me the ability to remote control the pre with the Grace remote. Once I do my recordings, I keep the pan in an arc across the screen. This helps me spacialise the orchestra and the players and help to glue it together. Once I achieve this, I can blend in the samples to give the grit and power that it needs. I own more than about 70 mics now and I am a mic geek! My current favorites are the Mojaves, the Flea M50s, and a few others that I like.
I also have some techniques that I use in the recordings. For example, I don’t measure and place the microphones in the space, but I know an approximation for this and I usually am right! I sometimes mic the Celli or the French Horn with 2 spot mics around 1 feet away and pan the second mic in the opposite direction in the mix after lowering it around 8 dB or so. This gives an incredible depth and placement very much like the Haas effect trick. I sometimes take the spot mic of the woodwinds, feed it to a reverb, and have that reverb play from speakers placed near the woodwind position and record that in the room mic. This gives me the tonality and body of the woodwind without the harshness of the spot mics. One technique I did on a movie was to have the choir on the loft of Air Studios, facing the wall opposite the mic and recorded the reflections to the mic. This game me such a lot of power and room to the choir. I usually use small capsule mics for rhythmic parts and large capsules with a little compression to get a big sound. I sometimes have the cellos play the higher harmonics to get an attack and color for the string section. At the end, I always start my mix from the Decca tree and room mics and add the spots only if I need too. I create my reverbs from the room mics as an extension of the room.
FM: How do you place your mics and how do you pan them in the mix?
AM: While recording, I have the Decca Tree at around 12 feet height. Then around 10 to 12 feet on the side from those, I have the outers. They pick up sounds that happen outside the image like French horns, Bass, Violas, and Back Violins etc. They also help to reinforce the image and so make the instruments glued. I do it at the same height while others may do it at a different height. In Hollywood, there is a tendency to make the image a bit larger than life. There are many ways to do this. Some take the left and right of the Decca tree and pan it extreme left and right. They then take the wide mics and do the same. Some will pan the Decca Tree in a bit so you have the left and right at around 10 o’clock and 2 o’clock position. They then pan the wide to the left and right. This is also great but in my experience doesn’t work really well with action films. There are other engineers who keep the Decca Left and Right at the left and right positions and pan the wide mics a bit off the screen to say around 20 percent into the surrounds. In my opinion, this is problematic because most theaters that you see aren’t really well calibrated. So if the delays of the surrounds are not set correctly, that causes a lot of issues in playback. I am not talking about Dolby Atmos, but the regular surround mix.
What I do is to keep the left and right of the Decca in a bit and the wide at the Left and Right position. What I then do for the surrounds is I have a set of mics at the same height of the Decca tree but facing the opposite direction and pointing in such a way that they form a shape of a star with the Decca. This gives me a very good image for my sounds and helps to build the sound scape around me. What I also do is to add 2 additional mics at around 16 feet or higher that I sometimes use as my surrounds, sometimes send it to the front and sometimes use it for my reverb feeds.
Now, the Decca Trees are M50s. I use them because they have a very interesting feature. They are small capsule mics and everybody thinks they are large ones. In fact, they are the same capsules in the KM 54s. This capsule is built into a lucite sphere. The high frequencies hit the diaphragm directly. What happens at lower frequencies is that they radiate into the sphere and form a kind of omnidirectional pattern. So, this is cardioid for higher frequencies at around 5k or 6k and kind of omni for lower ones. This gives a very good imaging as well as size. I use the ones from Flea for this. The wide mics are set in a wide cardioid and these give a sense of the space, definition and positioning. So much that when I don’t turn on any other mic, I know where the orchestra people are sitting and I get a sense of the size. Now for the surrounds, I use hyper-cardioid mics. There is a very interesting effect that I get when the back lobes cross each other. The left mic’s back lobe gets a bit of the celli and the right gets a bit of the violin. I like this interaction. It creates a bit of randomness that is phase coherent yet will not hurt you at the front and still will create a size at the back. I just know this from experience!
My next height is at around 8 feet and is an overall L C R mic. This is primarily for the string and the bass and the idea is to get some presence before the spot mics. I use the Mojaves for this and also have an additional mic sometimes behind and in front of the bass for a nice warm low end. At that same height are 2 Royer Ribbon mics above the woodwinds. These are in figure 8. I set it up so that the rejection is towards the strings. This gives me additional space for the woodwinds. I like the ribbons because they have a very warm character to the sound. At this height, I also have a Brass overall mic and a french horn overall mic. Now, I am almost 95 percent done! When using spots I use 4 for the strings. One front and one back for the first string and one front and one back for the second strings. Violas are panned left and right without using the center channel at around 11 and 1 position. For Celli, I use 1 mic for 4 players and add more if there are solos.
I keep changing mics and experimenting with them. This is an ongoing process that I feel doesn’t have an end!
FM: What advice would you like to say to the upcoming engineers?
AM: Don’t try and convince someone of something they don’t want. They may like it in the beginning but will come back to you to change. Remember, you are in the services business. You need to give the client what they need to make them happy. So over time, you will get a sense of what they like and how much you can change around. But if you go farther away from the initial concept, you have a bigger chance to lose the idea rather than enhance it. You also need to get it right at the source. I spend a lot of time thinking and honing my recording skills and micing techniques. You need to know your mics. You need to know what it does for you. Once you know that you can work your way quickly in dense tracks. This is very important when dealing with complex sessions. Once I get my recordings right, I rarely use individual EQs and Compression on the channels. This helps me mix faster and simpler. Remember, simplicity is a powerful tool. In today’s world of plugins and emulations, I don’t think I would advise you to spend money on outboard hardware, but I definitely would think it’s a great idea to invest in mics.
This is the simplicity and the warmth of one of Hollywood’s most sought after mix engineer. This is also what keeps him on the top of the game and the first choice of call for many composers. This was indeed a real honor and privilege to have you share these techniques with us! I haven’t written about how he uses plugins, his techniques in shaping the sound to create unique designs, etc. as those are things you would rather have when you learn it from the master himself. In fact head over to Mix with the Masters to see some amazing videos in regards to this.
All photos courtesy Mix With The Masters
-FM

Beautiful interview. Well done please keep on with your content. I always read the whole email before coming to the blog
Thank you! Will do!
All this tips for the reverb are so powerfull…I just want to say thanks
You are welcome!! 🙂
Wow this is very helpful. Great tips from the master.
Thanks!!
I’m glad I found this article. Alan’s depth of experience and technique is breathtaking. I learned a lot from this. I really like his philosophy related to movement within the mix, using the Haas efffect instead of or in addition to panning, and his thoughts on his use (and knowledge) of mics and the ways he uses them. But I REALLY like his different techniques with reverb, something I had not thought much about.
Question: I’m not sure what Alan means on one of his Bricasti techniques when he says they are inverted. Does that mean he’s swapping the left/right channels?
Thanks!
Thanks a lot Jeff. Yes. It was swapped. But he has changed that method I believe now.
Pingback: Innovative Sound Design Ideas to Elevate Your Films